Website map
Showing posts with label desserts. Show all posts

Thursday, October 29, 2015

Cauldron Cakes


A bunch of Potterheads united tonight to have a little Harry Potter party for Halloween. Fun fact: not a single person in attendance was a Gryffindor. So much for it being "the most popular house" and all...

I tried my hand at making Cauldron Cakes (recipe found here, but I used my own chocolate cupcake recipe instead of devil's food) and they didn't turn out too bad for a first timer! So, ya know, I had to give you all some close-up pictures of all the imperfections ;) I made the handles too thin though, and they kept breaking and/or melting as I tried to attach them to the cauldrons (even after freezing them and rubbing my hands on an ice pack to cool them down).

Oh well, at least I got one misshapen handle to attach properly enough to take a picture! (And it broke not long afterwards. Womp womp.) You could always change the filling (maybe dye it green) and call it a witch's cauldron instead of a Cauldron Cake to make it a more general Halloween treat... for those of you weirdos who don't like Harry Potter. :P


Saturday, March 14, 2015

Key Lime Pie {Recipe}


Happy Pie Day! I mean... Pi Day... but we all know that the proper way to celebrate is by eating pie rather than reciting the digits of an irrational number. Unless you love that sort of thing. In which case I won't judge you.

Now while I go eat a large variety of pies at a pie party tonight, please enjoy the recipe of one of my very favorite pies in the world (and the one I happened to make today). There's nothing quite like a good key lime pie, in my opinion.


KEY LIME PIE

Crust:
1 1/4 cups graham cracker crumbs
5 Tbsp melted butter
3 Tbsp sugar

Preheat the oven to 350 F. Combine the crumbs, butter, and sugar together and press the mixture into a 9" round pie pan. Bake for 5 minutes for a softer crust, or for 10 minutes for a crispier crust. (I like to do 8 minutes for a happy medium).

Filling:
7 egg yolks
4 Tsp lime zest
2 cans (14 oz. each) sweetened condensed milk
1 cup key lime juice

Mix the yolks with the lime zest until well blended, about a minute. Add the sweetened condensed milk first and mix, then add the key lime juice and mix again. Pour the filling into the prepared pie crust and bake for 20-24 minutes (at 350 F) or until the filling is firm at the center. Remove it from the oven and let it cool completely on a wire rack. Then put it in the refrigerator and chill for 2-3 hours.

Take the pie out of the fridge about 20 minutes before serving to take the chill off. To finish the pie, take a half pint of whipping cream, sweeten it with a little sugar, and then whip it up until it becomes fluffy and thick. You can either put dollops of the cream on the pie, pipe it around the edge, or do what I do and cover the WHOLE pie with it. For a little aesthetic flair, I like putting a little more lime zest on top. It looks pretty.


The last step, of course, is to enjoy!!! It's so yummy. I've made two in the past week!

Tuesday, February 3, 2015

Red Yoga Pants (and my favorite cookie)


With temperatures in the 50s and my postpartum workout routine in full swing, today was no day for warm clothes. I broke out my red cropped yoga pants (I lived in these during my pregnancy) and worked up a good sweat while Nicole watched, wide-eyed and smiling (and rolling over every now and then), as I did crunches to "What Makes You Beautiful". I'm not a One Direction fanatic, but that song is great for crunches!

Of course, every good workout deserves a little reward. I've been craving no-bake cookies foreeeever, and when a neighbor recently gave us some that were pretty similar to the ones I make, my craving doubled and I finally made a batch.

You can find the no-bake cookie recipe in a previous post (check out those lovely camera phone pics!)

Nicole didn't want to be put down while I made them, but I didn't let that stop me. I strapped her into one of our carriers and after a few rounds of singing "Agony" at the top of my lungs, I took out my phone to capture a picture of a baby that looked like this:


Works like a charm.


Thursday, October 23, 2014

Soft and Chewy Chocolate Chip Pumpkin Cookies


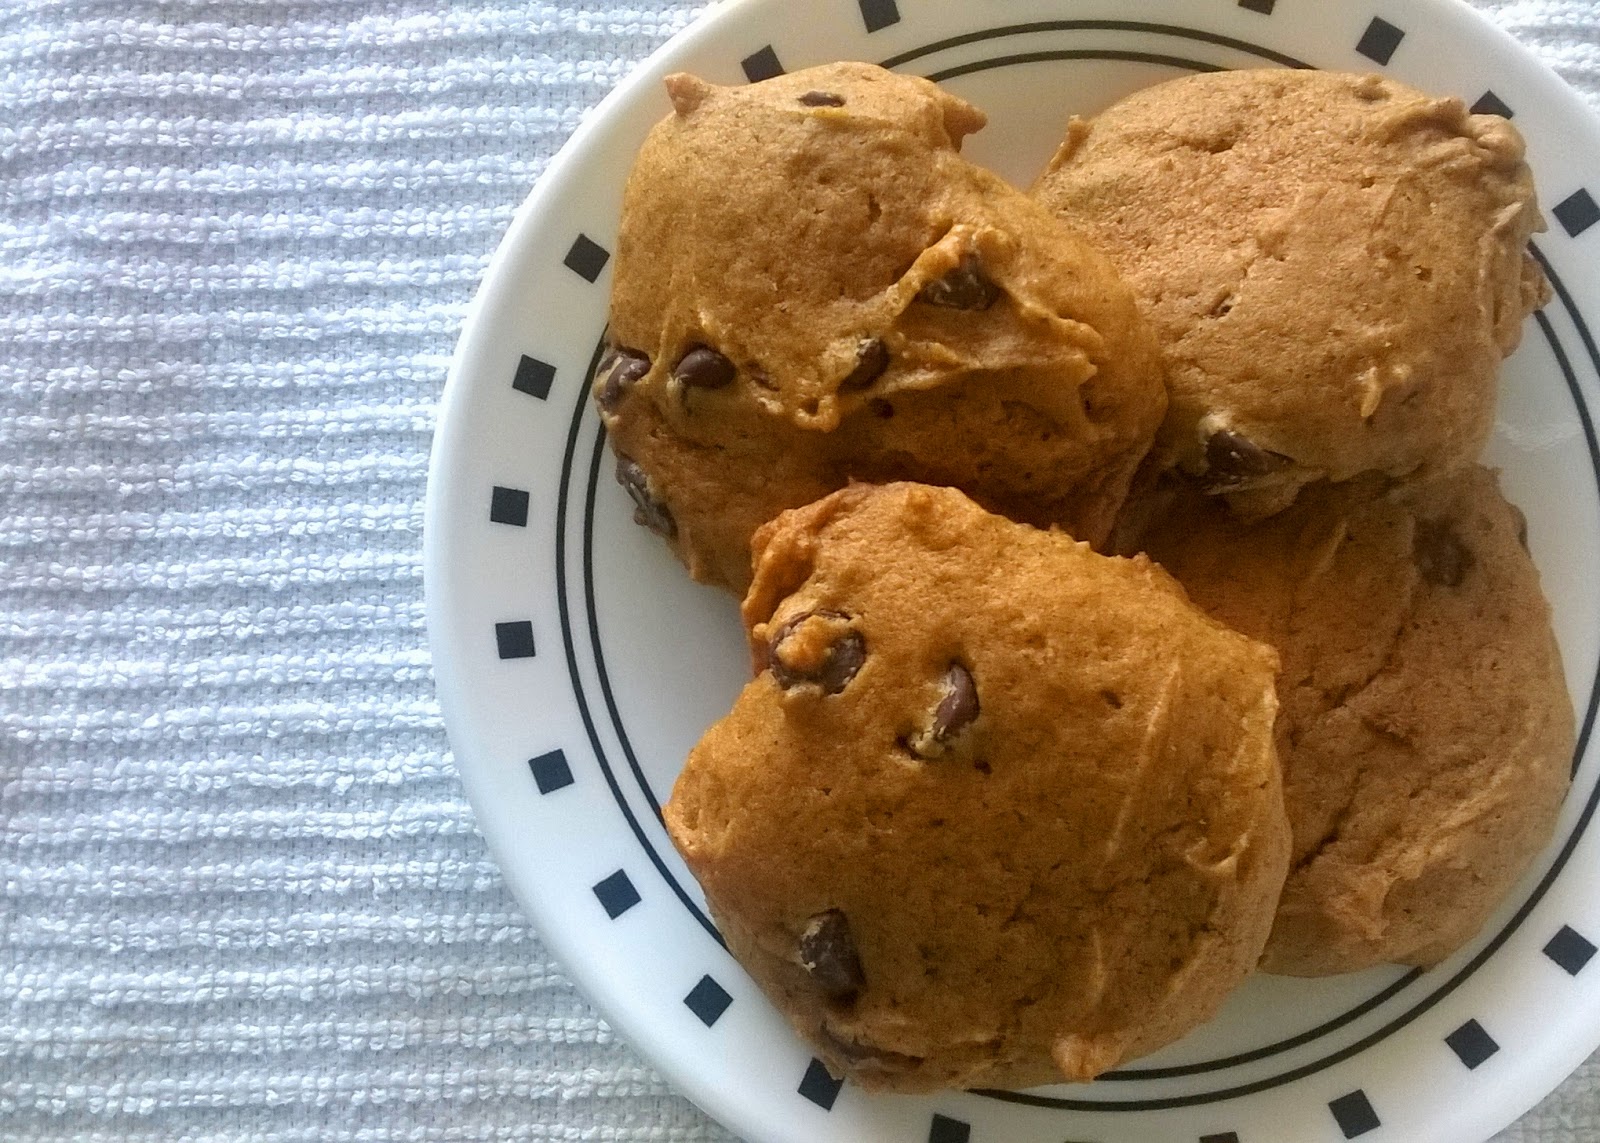
Pumpkin cookies. They are an autumn staple dessert, people! If there is one thing I love, it's a super moist and soft pumpkin cookie. Yum. Get in my belly! My phone's camera does not do these cookies justice, I promise!

I have made several different pumpkin foods so far this autumn season (don't get me started on the pumpkin pancakes I made a few days ago... they were so yummy topped with butter and brown sugar!) but until yesterday, I hadn't gotten around to making pumpkin cookies. That was a problem I needed to fix.


I love my mom's pumpkin cookie recipe, but I could not find my copy of it... so I looked up a couple different recipes online that were similar to my mom's and tweaked them a bit to come up with my own version. They turned out pretty well! And I love how orange they are.


Chocolate Chip Pumpkin Cookies

1 cup canned or fresh pumpkin puree
1/2 cup brown sugar
1/2 cup granulated sugar
1/2 cup oil
1 large egg
1 Tbsp vanilla
2 cups flour
2 tsp baking powder
1 tsp baking soda
2 tsp cinnamon
1 tsp nutmeg
1/2 tsp salt
1 cup chocolate chips

1. Preheat oven to 350 F.

2. Combine pumpkin, sugars, oil, egg, and vanilla in a bowl.

3. In a separate bowl, combine flour, baking powder, baking soda, cinnamon, nutmeg, and salt. Slowly add this flour mixture into the pumpkin mixture and mix well.

4. Mix in the chocolate chips.

5. Drop by medium spoonfuls onto a baking sheet (lined with parchment paper or lightly greased). Bake for 10-12 minutes. Let cool in pan for 2-3 minutes and then remove onto cookie rack to cool.

6. Enjoy with a big glass of milk! Store them in a sealed container to maintain moisture and freshness.


Really, you guys. These cookies are so good, I am not even joking! I am definitely going to be making them again this season. On another note... I've decided that I really want/need cookie scoops. Does anybody want to give me an early Christmas present? ;)


Thursday, July 10, 2014

{Recipe}: No-Bake Peanut Butter Squares


Sometimes, you NEED the classic chocolate-peanut butter combo.

And sometimes, it's the middle of summer and you don't want to turn on your oven.

I think these treats are the perfect solution! Not only does it satisfy my little preggo sweet-tooth, but I cannot eat these things without a good glass of milk - so our milk will quickly disappear as these treats do. The recipe is listed right below. Just take note that I did not use peanuts in mine; I just used a full 3 cups of graham cracker crumbs instead. Whatever floats your boat! And yes, I've shared this recipe on my blog before, but I can't help it! They're just so good! Gotta share the love.


No-Bake Peanut Butter Squares

2 cups powdered sugar
1 cup butter or margarine, softened
1 cup peanut butter
1 teaspoon vanilla
2 3/4 cups graham cracker crumbs
1 cup chopped peanuts (like I said before, I left these out and just used a little more graham cracker crumbs)

For topping:
1 package (12 ounces) semi-sweet chocolate chips (2 cups)
1/4 cup peanut butter

Line square pan, 9x9x2 inches, with aluminum foil. Beat powdered sugar, butter, 1 cup peanut butter, and vanilla in large bowl on medium speed. Stir in graham cracker crumbs and peanuts (mixture will be stiff). Press in pan.

Melt chocolate chips and 1/4 cup peanut butter over low heat, stirring frequently, until smooth. Spread over bars. Refrigerate about 1 hour, or until chocolate is fairly firm (but not too firm because you don't want the chocolate to break when you cut it!) Remove from pan, using foil to lift. Cut into rows (6x6 is a perfect snack-size, but for the pictures above I did 4x4). Refrigerate about 2 hours or until firm. Store covered in refrigerator.


Enjoy! (with an enormous glass of milk, of course)

post signature

Thursday, June 5, 2014

But waffles aren't awful...

I've mentioned to Doug more than once that we need to eat at "The Awful Waffle" but he never agreed to go eat there with me. Then a little over a week ago, the restaurant announced they'd be closing at the end of May... which resulted in all of their menu items being 50% off on May 31st. After two margherita pizzas and a big waffle covered in strawberries, nutella, and whipped cream, Doug admitted it was pretty good. And very worth it, with the 50% off.

And now we've graduated to mimicking the waffle creations of The Awful Waffle at home.

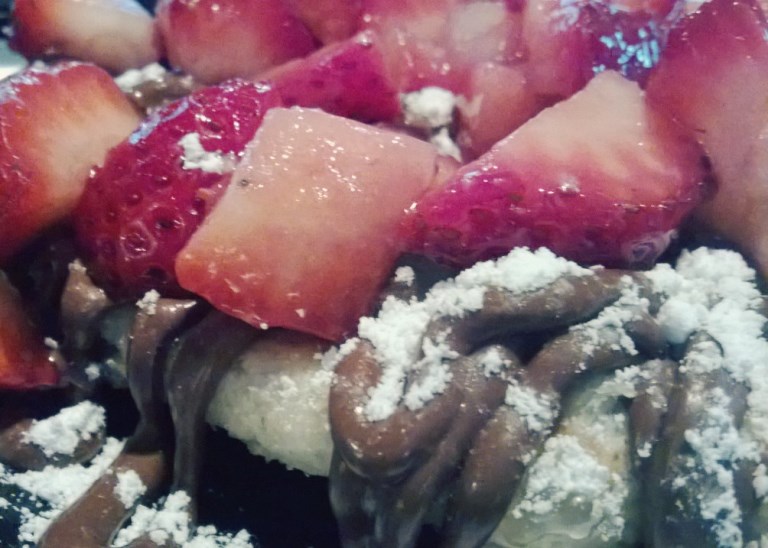
Exhibit A:


And yes, there is nutella layered under those strawberries. Yum.

For 4 days straight we ate waffles covered in nutella, strawberries, and whipped cream (the good, thick stuff that you have to whip and sweeten yourself) at some point during the day. Sometimes for brunch, sometimes for a late night snack... it's kind of ridiculous. But it tastes so good!!!!

And of course, the lighting is never good enough for a smartphone picture. But I take pictures anyways.

Exhibit B (We used an excessive amount of whipped cream.):


Somebody stop me, I'm going to overdose on these things! Yesterday we decided to take a waffle break so that we don't end up hating the taste of them by the end of the week.

At least I've withheld from slathering the waffles with ice cream. I've definitely done that more than once in the past, but the toppings we're using on these waffles are so much more addicting than using ice cream.

In other news... I went to the BYU spring ballroom dance lab last night. First time dancing in a month and a half. I've still got moves! And I've missed dancing so much. Like... so much. And it's such a good source of exercise!

post signature

Sunday, September 1, 2013

Ending the hiatus (and banana bites)

Pardon my blog hiatus. I'm just busy enjoying the last of my school-free summer hours (because BYU is strange and we don't start classes until this Tuesday. No complaints here, though).

Doug and I have been Harry Potter Marathon-ing it up over here (currently on movie 6) and I still need to make my snickerdoodle cookies sometime tomorrow. In the mean time, I've been snacking down on these awesome semi-but-not-really-healthy treats that I have affectionately termed "banana bites".


I originally got the idea from Pinterest (here) but I decided to flip things up a little. These little beauties are filled with Nutella and coated in melted peanut butter chips. The original ones on Pinterest are filled with peanut butter and coated in melted dark chocolate chips (although I used semi-sweet for mine).

I'm not going to lie... I think I like the super chocolaty ones a bit more. Go figure, I'm a chocoholic. The best part? Doug is not a fan of frozen bananas, so I got the whole batch to myself. I ate over half of them before I remembered I needed to take pictures.


In case you want to make them... you have to freeze the bananas and their filling first (about 1 hour) and THEN dip them in the melted coating. Otherwise they'll get mushy. And once you take the bananas out of the freezer to dip them you need to work fast because the bananas defrost quickly and the melted coating hardens quicker than you expect. Then just pop them back in the freezer again for a while and they're ready to eat!


Alrighty, it's back to the magical world of Harry now.

Must. Finish. Before. School. Starts.

post signature

Wednesday, August 28, 2013

Peanut Butter Cookies

In my personal opinion, peanut butter cookies are a great transition dessert. In other words, I'm ready for summer to be over but it feels too early to break out the pumpkin foods (and I needed something sweet!) and that's where peanut butter cookies come into the picture!

peanut butter cookies

This recipe is pretty good. In fact, my mom would steal my cookie book from me just so she could make them. I decided to try changing things up by using all brown sugar and using 1/2 cup of butter instead of 1/4 butter and 1/4 shortening. Supposedly, it makes the cookies richer... if you try my version, though, don't flatten the cookies with a fork or else they'll get too flat when you bake them.

Here's the original version!

Peanut Butter Cookies

1/2 cup granulated sugar
1/2 cup packed brown sugar
1/2 cup peanut butter
1/4 cup butter or margarine, softened
1/4 cup shortening
1 egg
1 1/4 cups all-purpose flour
3/4 teaspoon baking soda
1/2 teaspoon baking powder
1/4 teaspoon salt
Granulated sugar

Heat oven to 375 F. Beat granulated sugar, brown sugar, peanut butter, butter, shortening, and egg in large bowl with electric mixer on medium speed, or mix with spoon. Stir in flour, baking soda, baking powder, and salt.

Shape dough into 1 1/4 inch balls. Place about 3 inches apart on ungreased cookie sheet. Flatten slightly in crisscross pattern with fork or potato masher dipped into granulated sugar. Bake 9-10 minutes or until light brown. Cool 5 minutes; remove from cookie sheet to wire rack.

It makes about 2 1/2 dozen cookies, but I tend to make mine a little bigger :)

Enjoy!

peanut butter cookies

post signature

Friday, August 9, 2013

Texas Sheet Cake

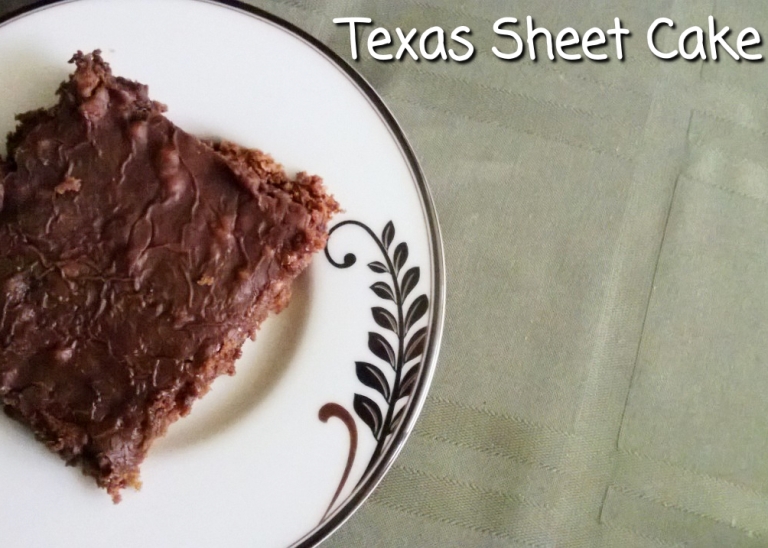
I don't know why this delectable dessert is called Texas Sheet Cake because it doesn't seem very "Texan" (can anybody shed some light on that for me?) but it sure is delicious! I could care less what it's called, as long as I can eat some.

If you have not heard of Texas Sheet Cake, I pity you. If you have, and if you like it, we can be friends. Because it makes my top 10 for the cake/brownie dessert category.

Texas Sheet Cake

Texas Sheet Cake


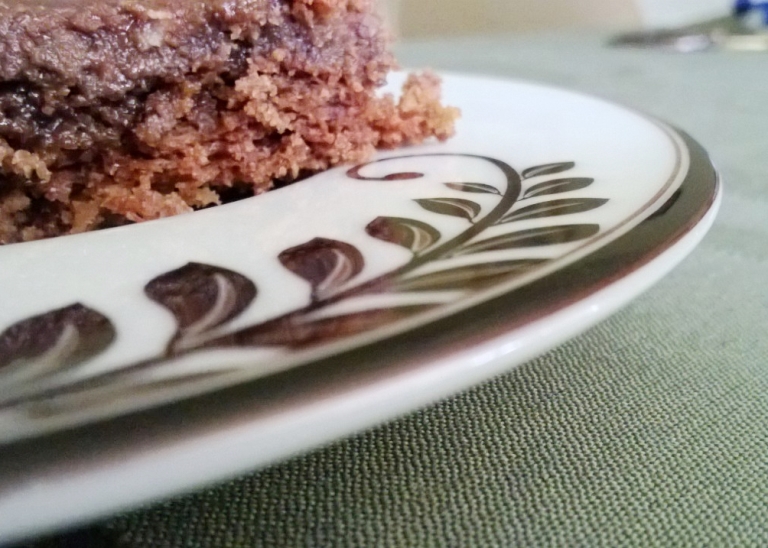
It's not your typical cake, so don't expect it to taste like one. It has a taste all its own! And it is wonderful when you serve it with ice cream :)


TEXAS SHEET CAKE

You will need:
2 cups flour
2 cups sugar
1/2 tsp salt
1 cup warm water
4 tbsp cocoa powder
2 sticks butter (I used margarine and it turned out fine)
1/2 cup sour cream
2 eggs
1 tsp baking soda

Preheat oven to 350 degrees. Mix together the flour, sugar, and salt. Set aside. In a saucepan, combine the water, cocoa powder, and butter. Bring to a boil. Mix the dry ingredients and the chocolate mixture together. Then add sour cream, eggs, and baking soda. Pour into a greased large cookie sheet or jelly roll pan with sides. Bake for 20 minutes.

While that bakes, you can make the FROSTING!

You will need:
1 stick butter (once again... I used margarine)
6 tbsp milk
4 tbsp cocoa powder
1 one lb. box powdered sugar
1 tsp vanilla

Bring butter, milk, and cocoa to a boil. Then turn off hear and add powdered sugar and beat until smooth. Add vanilla. Spread on warm cake.


Alright. Now stop looking at this blog post and go make it for yourself. It's yummy, I promise!


Thursday, July 25, 2013

Sometimes you've got to "girl" things up

On Tuesday and Wednesday, we did not have any performances for the play I'm working on. Two whole nights!!!! I was almost at loss for what to do with myself... but Tuesday evening turned into a girls night of sorts. Pardon my lack of pool pictures, I preferred to swim and chat rather than bother with my camera. You can't blame me, right? I did snap one shot, but I'm not in it... I don't think you guys would want to see my super white legs anyways.


And no GNO is complete without dinner and a movie! We stopped by The Awful Waffle for some savory crepes, fries, Italian-style pizza, and dessert waffles. For those of you living in Provo who have never been there... go. Now.

The lighting was horrible for smartphone pictures, but I took some anyways. Look! The tables are made of this black material that you can write on with chalk! And the waffles are to die for. Really truly.


Horrible lighting, am I right? But those waffles taste good, let me tell ya! And then it was back to an apartment to watch... wait for iiiiiiiit... Star Wars. Yes, you heard me. Return of the Jedi. Who said GNO movies had to be chick flicks? For the record, I had Sense and Sensibility in my bag just in case.

Please tell me I'm not alone in my Star Wars fanaticism...
#ItsATrap


Thursday, July 11, 2013

The BEST no-bake cookie recipe there is!

I am a huge fan of chocolate/peanut butter combos, as I said when I shared this recipe last September.

This being said, I am a sucker for a good no-bake cookie. There are plenty of no-bake cookies recipes out there, each a little different from the next, but I would like to claim that I have pinpointed the best no-bake cookie recipe of them all! I tell no lies! These things are amazing!

Don't mind me playing with photo filters in these pictures :) It's something I'm trying out.

no-bake cookies
no-bake cookies
no-bake cookies
no-bake cookies

I made two batches because I promised my cast members that I would bring them a treat on the day of our first run-through, and they were gone in a heart-beat. I've eaten tons of them already.

You guys... I don't call them the best dang cookies for nothing!

For those of you who don't believe me, go try them for yourselves.

The BEST No-Bake Cookies

Ingredients:
5 tablespoons cocoa
1 stick margarine
2 cups sugar
1/2 cup milk
3/4 cup peanut butter
1 teaspoon vanilla
3 cups oatmeal

Directions:
Mix the cocoa, margarine, sugar, and milk in a saucepan and bring to a boil, making sure that you stir it constantly. Let it boil for 2 minutes (or 1 1/2 minutes if you have a pot that retains a lot of heat because the mixture will keep bubbling after you take it off the stove... you might have to experiment), still stirring constantly. Add peanut butter and vanilla. Mix well. Add oatmeal. Drop spoonfuls on cookie sheet. Let cool (I put mine in the refrigerator).


Short, sweet, and simple. Just make sure you boil it for the right amount of time or else the cookies will be too sticky (not enough boiling) or too dry (too much boiling).

I promise, you'll enjoy them!

Saturday, June 22, 2013

Cupcakes & A Preggo Lady

Before you ask, no I'm not the preggo lady.

But as for my former roommate... she sure is! Her baby girl is due in August, and we're all so excited to see her! In the meantime, I figured it wouldn't hurt to take the mama-to-be out on a birthday cupcake outing. Because what preggo lady doesn't like cupcakes?


I may or may not awkwardly rub Donnie's belly each time I see her.
What can I say? It's become a tradition.

Meanwhile, I'm enjoying a couple days of no-school before summer term starts up. No rest for the wicked! I'm like the Energizer Bunny, I just keep going and going...