Website map
Showing posts with label recipes. Show all posts

Saturday, March 14, 2015

Key Lime Pie {Recipe}


Happy Pie Day! I mean... Pi Day... but we all know that the proper way to celebrate is by eating pie rather than reciting the digits of an irrational number. Unless you love that sort of thing. In which case I won't judge you.

Now while I go eat a large variety of pies at a pie party tonight, please enjoy the recipe of one of my very favorite pies in the world (and the one I happened to make today). There's nothing quite like a good key lime pie, in my opinion.


KEY LIME PIE

Crust:
1 1/4 cups graham cracker crumbs
5 Tbsp melted butter
3 Tbsp sugar

Preheat the oven to 350 F. Combine the crumbs, butter, and sugar together and press the mixture into a 9" round pie pan. Bake for 5 minutes for a softer crust, or for 10 minutes for a crispier crust. (I like to do 8 minutes for a happy medium).

Filling:
7 egg yolks
4 Tsp lime zest
2 cans (14 oz. each) sweetened condensed milk
1 cup key lime juice

Mix the yolks with the lime zest until well blended, about a minute. Add the sweetened condensed milk first and mix, then add the key lime juice and mix again. Pour the filling into the prepared pie crust and bake for 20-24 minutes (at 350 F) or until the filling is firm at the center. Remove it from the oven and let it cool completely on a wire rack. Then put it in the refrigerator and chill for 2-3 hours.

Take the pie out of the fridge about 20 minutes before serving to take the chill off. To finish the pie, take a half pint of whipping cream, sweeten it with a little sugar, and then whip it up until it becomes fluffy and thick. You can either put dollops of the cream on the pie, pipe it around the edge, or do what I do and cover the WHOLE pie with it. For a little aesthetic flair, I like putting a little more lime zest on top. It looks pretty.


The last step, of course, is to enjoy!!! It's so yummy. I've made two in the past week!

Tuesday, February 3, 2015

Red Yoga Pants (and my favorite cookie)


With temperatures in the 50s and my postpartum workout routine in full swing, today was no day for warm clothes. I broke out my red cropped yoga pants (I lived in these during my pregnancy) and worked up a good sweat while Nicole watched, wide-eyed and smiling (and rolling over every now and then), as I did crunches to "What Makes You Beautiful". I'm not a One Direction fanatic, but that song is great for crunches!

Of course, every good workout deserves a little reward. I've been craving no-bake cookies foreeeever, and when a neighbor recently gave us some that were pretty similar to the ones I make, my craving doubled and I finally made a batch.

You can find the no-bake cookie recipe in a previous post (check out those lovely camera phone pics!)

Nicole didn't want to be put down while I made them, but I didn't let that stop me. I strapped her into one of our carriers and after a few rounds of singing "Agony" at the top of my lungs, I took out my phone to capture a picture of a baby that looked like this:


Works like a charm.


Thursday, October 23, 2014

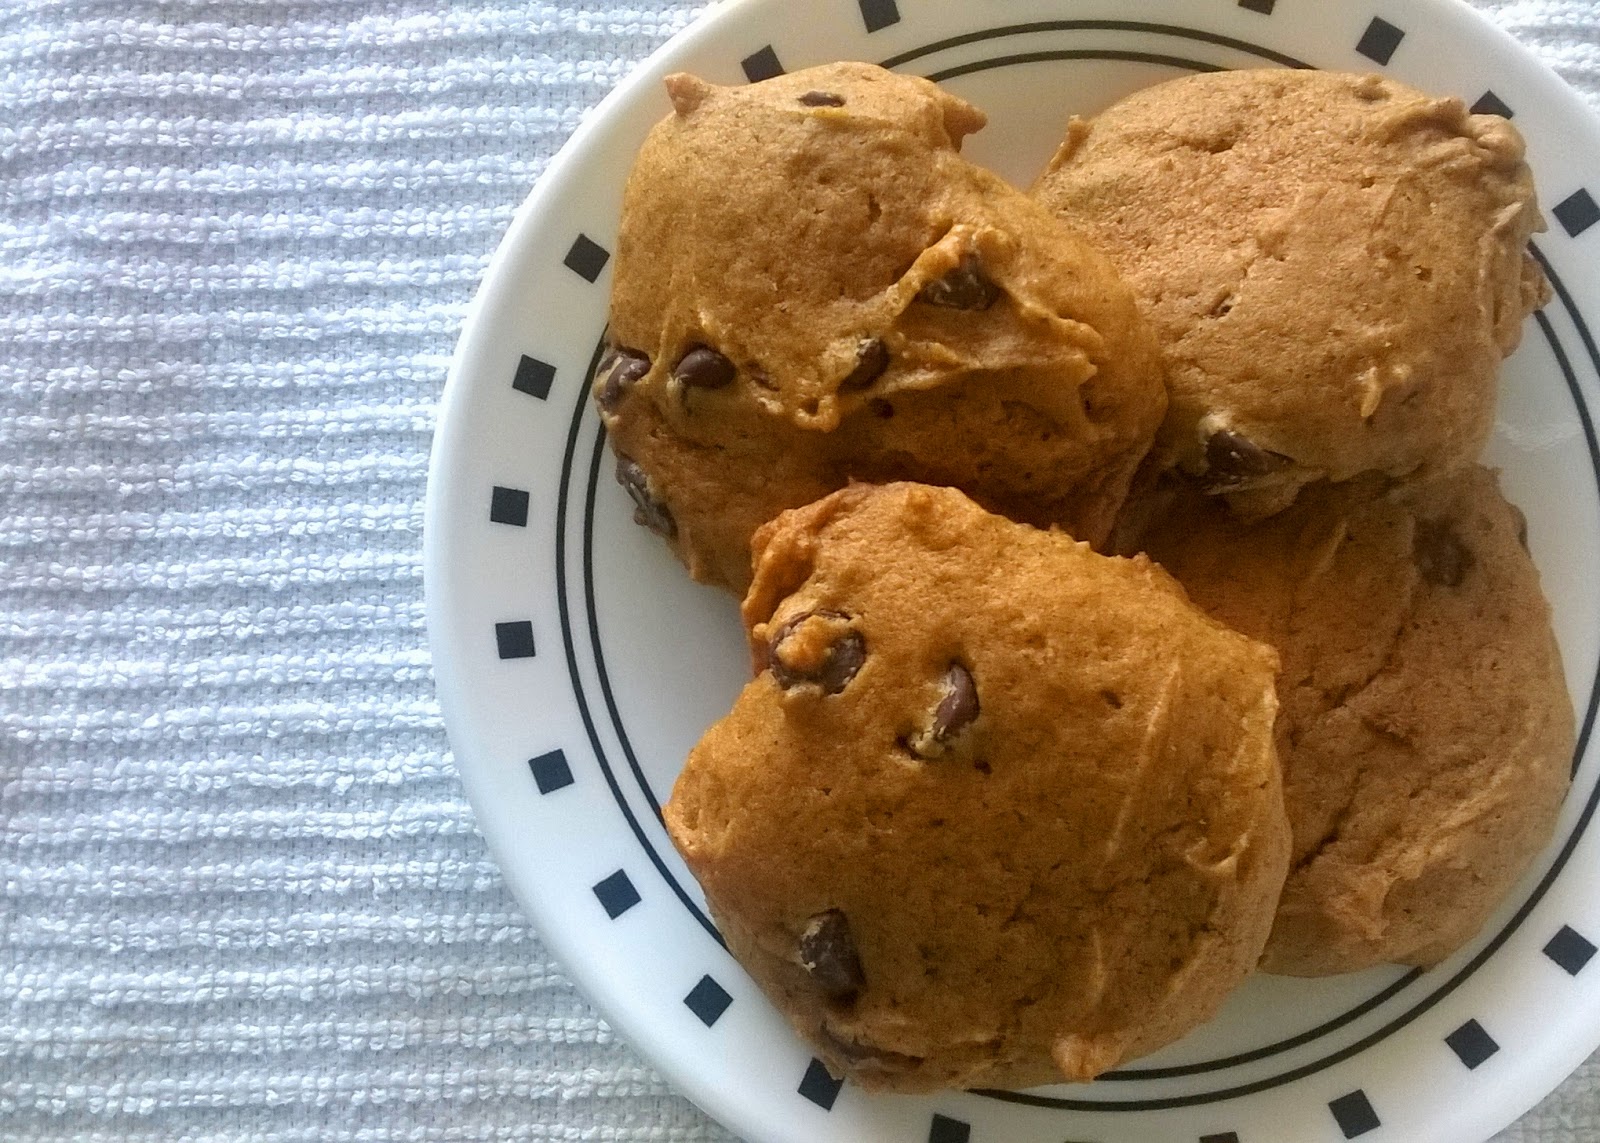
Soft and Chewy Chocolate Chip Pumpkin Cookies


Pumpkin cookies. They are an autumn staple dessert, people! If there is one thing I love, it's a super moist and soft pumpkin cookie. Yum. Get in my belly! My phone's camera does not do these cookies justice, I promise!

I have made several different pumpkin foods so far this autumn season (don't get me started on the pumpkin pancakes I made a few days ago... they were so yummy topped with butter and brown sugar!) but until yesterday, I hadn't gotten around to making pumpkin cookies. That was a problem I needed to fix.


I love my mom's pumpkin cookie recipe, but I could not find my copy of it... so I looked up a couple different recipes online that were similar to my mom's and tweaked them a bit to come up with my own version. They turned out pretty well! And I love how orange they are.


Chocolate Chip Pumpkin Cookies

1 cup canned or fresh pumpkin puree
1/2 cup brown sugar
1/2 cup granulated sugar
1/2 cup oil
1 large egg
1 Tbsp vanilla
2 cups flour
2 tsp baking powder
1 tsp baking soda
2 tsp cinnamon
1 tsp nutmeg
1/2 tsp salt
1 cup chocolate chips

1. Preheat oven to 350 F.

2. Combine pumpkin, sugars, oil, egg, and vanilla in a bowl.

3. In a separate bowl, combine flour, baking powder, baking soda, cinnamon, nutmeg, and salt. Slowly add this flour mixture into the pumpkin mixture and mix well.

4. Mix in the chocolate chips.

5. Drop by medium spoonfuls onto a baking sheet (lined with parchment paper or lightly greased). Bake for 10-12 minutes. Let cool in pan for 2-3 minutes and then remove onto cookie rack to cool.

6. Enjoy with a big glass of milk! Store them in a sealed container to maintain moisture and freshness.


Really, you guys. These cookies are so good, I am not even joking! I am definitely going to be making them again this season. On another note... I've decided that I really want/need cookie scoops. Does anybody want to give me an early Christmas present? ;)


Thursday, July 10, 2014

{Recipe}: No-Bake Peanut Butter Squares


Sometimes, you NEED the classic chocolate-peanut butter combo.

And sometimes, it's the middle of summer and you don't want to turn on your oven.

I think these treats are the perfect solution! Not only does it satisfy my little preggo sweet-tooth, but I cannot eat these things without a good glass of milk - so our milk will quickly disappear as these treats do. The recipe is listed right below. Just take note that I did not use peanuts in mine; I just used a full 3 cups of graham cracker crumbs instead. Whatever floats your boat! And yes, I've shared this recipe on my blog before, but I can't help it! They're just so good! Gotta share the love.


No-Bake Peanut Butter Squares

2 cups powdered sugar
1 cup butter or margarine, softened
1 cup peanut butter
1 teaspoon vanilla
2 3/4 cups graham cracker crumbs
1 cup chopped peanuts (like I said before, I left these out and just used a little more graham cracker crumbs)

For topping:
1 package (12 ounces) semi-sweet chocolate chips (2 cups)
1/4 cup peanut butter

Line square pan, 9x9x2 inches, with aluminum foil. Beat powdered sugar, butter, 1 cup peanut butter, and vanilla in large bowl on medium speed. Stir in graham cracker crumbs and peanuts (mixture will be stiff). Press in pan.

Melt chocolate chips and 1/4 cup peanut butter over low heat, stirring frequently, until smooth. Spread over bars. Refrigerate about 1 hour, or until chocolate is fairly firm (but not too firm because you don't want the chocolate to break when you cut it!) Remove from pan, using foil to lift. Cut into rows (6x6 is a perfect snack-size, but for the pictures above I did 4x4). Refrigerate about 2 hours or until firm. Store covered in refrigerator.


Enjoy! (with an enormous glass of milk, of course)

post signature

Wednesday, August 28, 2013

Peanut Butter Cookies

In my personal opinion, peanut butter cookies are a great transition dessert. In other words, I'm ready for summer to be over but it feels too early to break out the pumpkin foods (and I needed something sweet!) and that's where peanut butter cookies come into the picture!

peanut butter cookies

This recipe is pretty good. In fact, my mom would steal my cookie book from me just so she could make them. I decided to try changing things up by using all brown sugar and using 1/2 cup of butter instead of 1/4 butter and 1/4 shortening. Supposedly, it makes the cookies richer... if you try my version, though, don't flatten the cookies with a fork or else they'll get too flat when you bake them.

Here's the original version!

Peanut Butter Cookies

1/2 cup granulated sugar
1/2 cup packed brown sugar
1/2 cup peanut butter
1/4 cup butter or margarine, softened
1/4 cup shortening
1 egg
1 1/4 cups all-purpose flour
3/4 teaspoon baking soda
1/2 teaspoon baking powder
1/4 teaspoon salt
Granulated sugar

Heat oven to 375 F. Beat granulated sugar, brown sugar, peanut butter, butter, shortening, and egg in large bowl with electric mixer on medium speed, or mix with spoon. Stir in flour, baking soda, baking powder, and salt.

Shape dough into 1 1/4 inch balls. Place about 3 inches apart on ungreased cookie sheet. Flatten slightly in crisscross pattern with fork or potato masher dipped into granulated sugar. Bake 9-10 minutes or until light brown. Cool 5 minutes; remove from cookie sheet to wire rack.

It makes about 2 1/2 dozen cookies, but I tend to make mine a little bigger :)

Enjoy!

peanut butter cookies

post signature

Friday, August 9, 2013

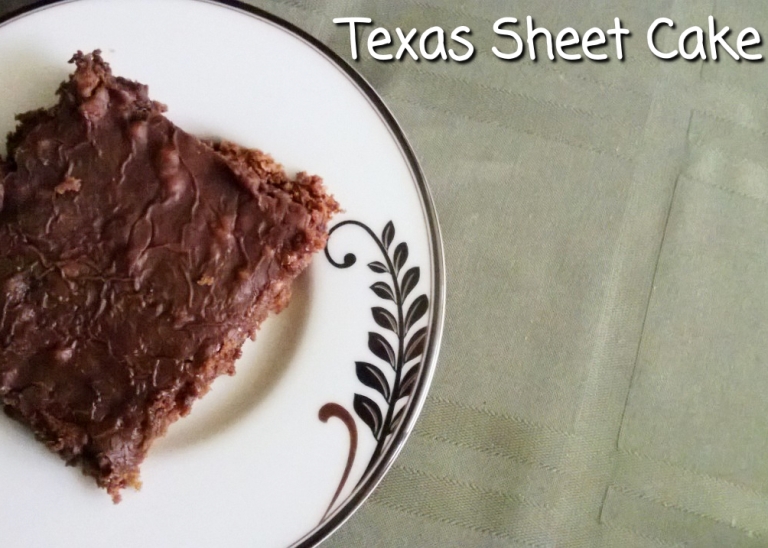
Texas Sheet Cake

I don't know why this delectable dessert is called Texas Sheet Cake because it doesn't seem very "Texan" (can anybody shed some light on that for me?) but it sure is delicious! I could care less what it's called, as long as I can eat some.

If you have not heard of Texas Sheet Cake, I pity you. If you have, and if you like it, we can be friends. Because it makes my top 10 for the cake/brownie dessert category.

Texas Sheet Cake

Texas Sheet Cake


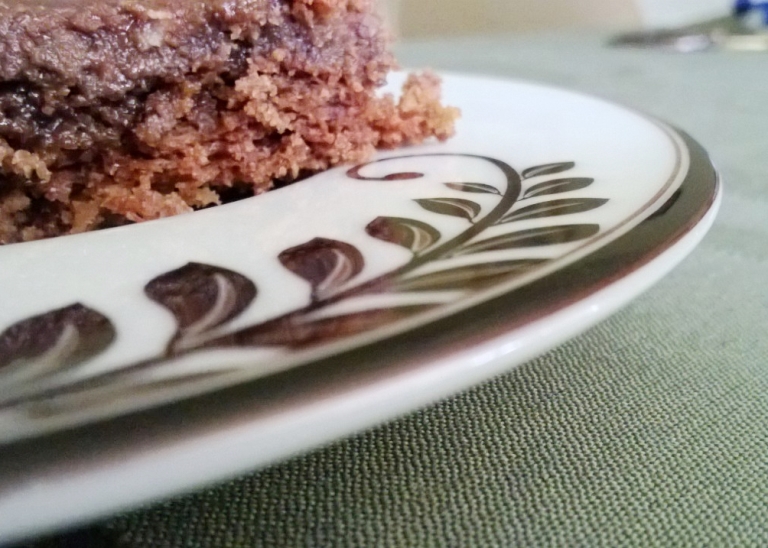
It's not your typical cake, so don't expect it to taste like one. It has a taste all its own! And it is wonderful when you serve it with ice cream :)


TEXAS SHEET CAKE

You will need:
2 cups flour
2 cups sugar
1/2 tsp salt
1 cup warm water
4 tbsp cocoa powder
2 sticks butter (I used margarine and it turned out fine)
1/2 cup sour cream
2 eggs
1 tsp baking soda

Preheat oven to 350 degrees. Mix together the flour, sugar, and salt. Set aside. In a saucepan, combine the water, cocoa powder, and butter. Bring to a boil. Mix the dry ingredients and the chocolate mixture together. Then add sour cream, eggs, and baking soda. Pour into a greased large cookie sheet or jelly roll pan with sides. Bake for 20 minutes.

While that bakes, you can make the FROSTING!

You will need:
1 stick butter (once again... I used margarine)
6 tbsp milk
4 tbsp cocoa powder
1 one lb. box powdered sugar
1 tsp vanilla

Bring butter, milk, and cocoa to a boil. Then turn off hear and add powdered sugar and beat until smooth. Add vanilla. Spread on warm cake.


Alright. Now stop looking at this blog post and go make it for yourself. It's yummy, I promise!


Thursday, July 11, 2013

The BEST no-bake cookie recipe there is!

I am a huge fan of chocolate/peanut butter combos, as I said when I shared this recipe last September.

This being said, I am a sucker for a good no-bake cookie. There are plenty of no-bake cookies recipes out there, each a little different from the next, but I would like to claim that I have pinpointed the best no-bake cookie recipe of them all! I tell no lies! These things are amazing!

Don't mind me playing with photo filters in these pictures :) It's something I'm trying out.

no-bake cookies
no-bake cookies
no-bake cookies
no-bake cookies

I made two batches because I promised my cast members that I would bring them a treat on the day of our first run-through, and they were gone in a heart-beat. I've eaten tons of them already.

You guys... I don't call them the best dang cookies for nothing!

For those of you who don't believe me, go try them for yourselves.

The BEST No-Bake Cookies

Ingredients:
5 tablespoons cocoa
1 stick margarine
2 cups sugar
1/2 cup milk
3/4 cup peanut butter
1 teaspoon vanilla
3 cups oatmeal

Directions:
Mix the cocoa, margarine, sugar, and milk in a saucepan and bring to a boil, making sure that you stir it constantly. Let it boil for 2 minutes (or 1 1/2 minutes if you have a pot that retains a lot of heat because the mixture will keep bubbling after you take it off the stove... you might have to experiment), still stirring constantly. Add peanut butter and vanilla. Mix well. Add oatmeal. Drop spoonfuls on cookie sheet. Let cool (I put mine in the refrigerator).


Short, sweet, and simple. Just make sure you boil it for the right amount of time or else the cookies will be too sticky (not enough boiling) or too dry (too much boiling).

I promise, you'll enjoy them!

Monday, May 13, 2013

Baby Dutch Babies

Behold... the result of my latest mini kitchen experiment.


The "full-sized" version of these bites are known by many names: puffed pancakes, dutch babies, dutch oven pancakes, German pancakes... the list goes on. I grew up calling them German pancakes, but I've really grown to like the sound of "Dutch Babies".

So, I suppose that you could call these Baby Dutch Babies. They're teeny-tiny! And they still taste pretty similar to their full-sized counterparts.

I saw the recipe in a book and thought it would make a fun Monday evening project. They were very fast to make, although I did panic a little bit when I was only able to fill up 12 muffin tins instead of 24. I suppose my mini-muffin tin is not the smallest you can get. This recipe calls for tiny muffin tins, folks. That way, these Baby Dutch Babies will literally be bite-sized. Mine are twice as big as they should be (apparantly) but they still taste pretty good.

Note to self: I need to get a powdered sugar shaker. It will make life easier, food prettier, and my kitchen less messy.


For those of you who are curious and want to try this recipe yourselves, here ya go!

Baby Dutch Babies (Makes either 12 or 24, depending on the size of the mini-muffin tin you use)

1/2 cup flour
3/4 cup milk
2 large eggs
1/8 tsp salt

Place your muffin tin in the oven and preheat to 400 degrees. While the oven is heating, mix the four ingredients in a blender until smooth. When the oven is done heating, take the muffin tin out (careful, it's hot!) and quickly spray it with cooking spray. Fill the tins 3/4 full with batter and then stick it in the oven for 10-12 minutes or until the baby dutch babies look puffy and slightly golden.

Melt 2 tbsp butter, and when you take the bites out of the pan, drizzle the butter over them. Then you can either dip the baby dutch babies in syrup or do what I did: take some strawberries (5-6, frozen or fresh) and blend them up. Pour them over the dutch babies and sprinkle some powdered sugar. I think these also taste good with yogurt, and I daresay that Nutella would taste pretty awesome on them as well. Dang it, I should have tried that... I have a big, fat container of Nutella sitting in my cupboard...

Enjoy!

Sunday, November 25, 2012

African Style Crock Pot Chicken... with a Twist!

One of my husband's old roommates introduced this recipe to us.
It's probably one of my favorite crock pot recipes now.

Doug tells me that the first time he invited me to eat some (back before we were even dating) I made a weird face and didn't eat any.
I don't remember that... and I almost don't believe him, because this stuff is so good!!!! Why would I NOT eat it?!

I mean, look at it!


Maybe I thought it was curry or something... because I can't handle super spicy very well.


Okay... maybe these pictures don't make it look extremely appetizing... but it really is! I promise!

The original recipe actually calls for turkey... and there aren't any tomatoes in it... but Doug and I both like the chicken better, and the tomatoes add a nice flavor.

Here's our version of the recipe:

African Style Crock Pot Chicken (serves 4-6)

Ingredients:
1 onion, chopped
4 garlic cloves, minced
1/2 teaspoon crushed red pepper flakes
1 teaspoon minced fresh ginger
2 lbs skinless boneless chicken breasts (4 breasts), cut into 2 x 12 inch slices
1 teaspoon salt
1/2 teaspoon pepper
1/4 cup lime (or lemon) juice
1 can (14.5 oz) diced tomatoes
hot cooked rice

Directions:

  1. Combine all ingredients (except rice) in crock pot.
  2. Cover.
  3. Cook on LOW for 8 hours (HIGH 4 hours)
  4. Serve over rice

Isn't that easy? I love crock pots, they just take all of the work away... and then you just have to sit there and smell the chicken for several hours as it cooks. That's definitely the hardest part.

You should try it sometime. You really should. I'm going to go eat leftovers right now!


post signature

Monday, September 24, 2012

A Combo I Cannot Resist

If there is one dessert combo I love, it is that of peanut butter and chocolate.
It is divinity in an edible form.
If you want to get on my good side, feed me something with PB&C.
It's a true weakness, and an effective way to get me to consume too many sweets in one day.

My family and I had a tradition as I was growing up of making cookies or brownies every Sunday. The kids would take turns every week choosing/making the dessert. You can bet your britches that when it was my turn, the dessert would be something involving the classic peanut butter/chocolate combo.

No-bake cookies are an all-time favorite of mine. Top of the list, for sure. However, I've discovered a different recipe that is just as yummy... and my hubby definitely has trouble staying away from them.

In fact, we just made these delectable delights this very evening! I just got done cutting them up... the chocolate topping is still a little soft.

Behold... No-Bake Peanut Butter Squares!

Doesn't it make you drool just looking at them?! I've already eaten a couple.


Let me share the happiness with you.

No-Bake Peanut Butter Squares

2 cups powdered sugar
1 cup butter or margarine, softened
1 cup peanut butter
1 teaspoon vanilla
2 3/4 cups graham cracker crumbs
1 cup chopped peanuts (I always leave these out)
For topping:
1 package (12 ounces) semi-sweet chocolate chips (2 cups)
1/4 cup peanut butter

Line square pan, 9x9x2 inches, with aluminum foil. Beat powdered sugar, butter, 1 cup peanut butter, and vanilla in large bowl on medium speed. Stir in graham cracker crumbs and peanuts (mixture will be stiff). Press in pan.

Melt chocolate chips and 1/4 cup peanut butter over low heat, stirring frequently, until smooth. Spread over bars. Refrigerate about 1 hour, or until chocolate is fairly firm (but not too firm because you don't want the chocolate to break when you cut it!) Remove from pan, using foil to lift. Cut into rows (6x6 is a good size). Refrigerate about 2 hours or until firm. Store covered in refrigerator.


There you go. Now you can have happiness in your life. Unless you are one of those people who does not like peanut butter. If you are... you are missing out on a great-tasting treat. Just saying.

post signature

Thursday, September 13, 2012

MORE crafts/recipes that I want to do...

More stuff from Pinterest...
Now I need to actually get off my bum and DO these projects!

Especially this one!
Paper pumpkins... SO cute!
                                                                                    Source: bhg.com via Ashley on Pinterest


Nails! I love stuff that's candy corn themed :)
                                                                   Source: adventuresinacetone.blogspot.com via Ashley on Pinterest


Baked Pumpkin Donuts
                                                                            Source: kingarthurflour.com via Ashley on Pinterest


Cute Pumpkin Candle Holder
                                                                           Source: my-weddingdream.com via Ashley on Pinterest


Um..... YUM!
                                                                    Source: akitchenaddiction.blogspot.com via Ashley on Pinterest


Got any great fall Pinterest finds?
Let me know about them!
I love adding fall projects to my Pinterest collection!

post signature

Friday, July 13, 2012

Piña Coladas

Two words: Piña. Colada.
I have an obsession with this pineapple-coconut mixture. What a combo!
I happened across a recipe that I loved and (with a few adjustments) have been using it ever since. No alcohol, tons of fruity goodness, and very refreshing!

For a good 2 servings, you'll need:
  • 1/2 cup pineapple juice
  • 1/2 cup pineapple tidbits
  • 1/4 cup coconut milk
  • Sugar and vanilla to taste (optional)

Put the first 3 ingredients in a blender and add about 6 ice cubes. Pulse the blender on high until the ice is just about all chopped up.

This is usually the point where I add the sugar and vanilla. I just eyeball it, but I'd say about 1/2 tsp of vanilla and 1/2 tbsp of sugar. It's not necessary, but it adds flavor!

Add in another 6 ice cubes and pulse a bit to chop them up, then run the blender on high for around 15 seconds. Check your drink's consistency. If it's still too runny, add another couple ice cubes.

Run the blender/add ice until your pina colada looks like this:


Yum yum yum! Enjoy!